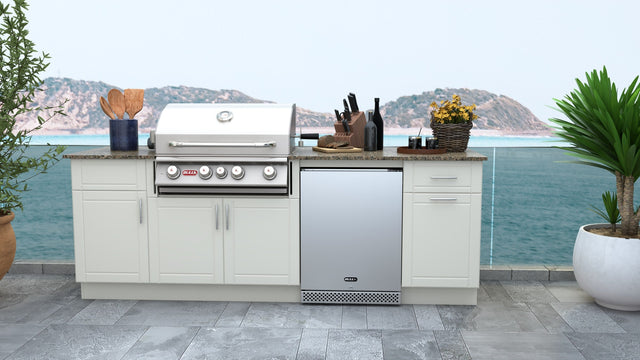
How to Prepare Your Patio for a Modular Outdoor Kitchen
Table of Contents
- Start With the Patio Surface
- Check That the Surface Is Level and Stable
- Measure the Space and Plan the Layout
- Plan Clearance Around the Island
- Plan Fuel, Electrical, and Water Before You Order
- Plan the Delivery From the Curb to the Patio
- Patio Readiness Checklist
- Next Steps
- Frequently Asked Questions
Last Updated: October 12, 2026
A modular outdoor kitchen island is heavy, and it needs four things from your patio: a stable, level base, room to work around it, a plan for utilities, and a clear route from the curb. Here's how to check each one before you order, so the island you choose fits the space you have.
Start With the Patio Surface
The surface under the island has to stay put. Before you order, walk the spot where the island will sit and look closely at what's under it. The installation manual for the island you choose is the final word on the base it needs, and local code can add requirements of its own.
Concrete Slabs and Compacted Bases
A sound concrete slab is a common base for an outdoor kitchen island. Look for cracks that are widening or have one side higher than the other, broken edges, sections that have sunk or lifted, and spots where water pools after rain. Fine surface cracks are common in older concrete; cracks that keep growing or have uneven edges are worth having a concrete contractor look at.
A compacted gravel or sand base needs to be firm and settled. Press down in several places across the footprint. If the base feels soft or shifts underfoot, it needs work before an island goes on it.
Pavers and Natural Stone
Paver and natural stone patios can work if the base underneath is sound. Walk the footprint and feel for pavers or stones that rock, sink, or sound hollow. With dry-laid pavers, the problem is usually the base or the joint sand rather than the pavers themselves. Stone set in mortar over a slab is only as stable as the slab under it.
Wood and Composite Decks
Decks need the most caution. Wood and composite decks flex under load, and an island with a countertop and appliances is a heavy, concentrated load. Don't plan an island on a deck unless the island's installation manual allows it and a qualified professional has confirmed the deck can carry it.
What to Fix Versus What to Flag
Not every flaw needs a repair. Minor surface cracks and color variation are normal. Before you order, flag these to a qualified contractor: cracks that are growing or have uneven edges, a slab that ponds water, rocking or spongy pavers across the footprint, stones that move underfoot, and a deck that bounces or shows rot or loose hardware. Photos of each problem make that conversation faster. Fix surface problems before delivery, not after the island is in place.
Check That the Surface Is Level and Stable
A level base keeps the island from rocking, helps doors and drawers close properly, and lets appliances sit the way the manufacturer intended.
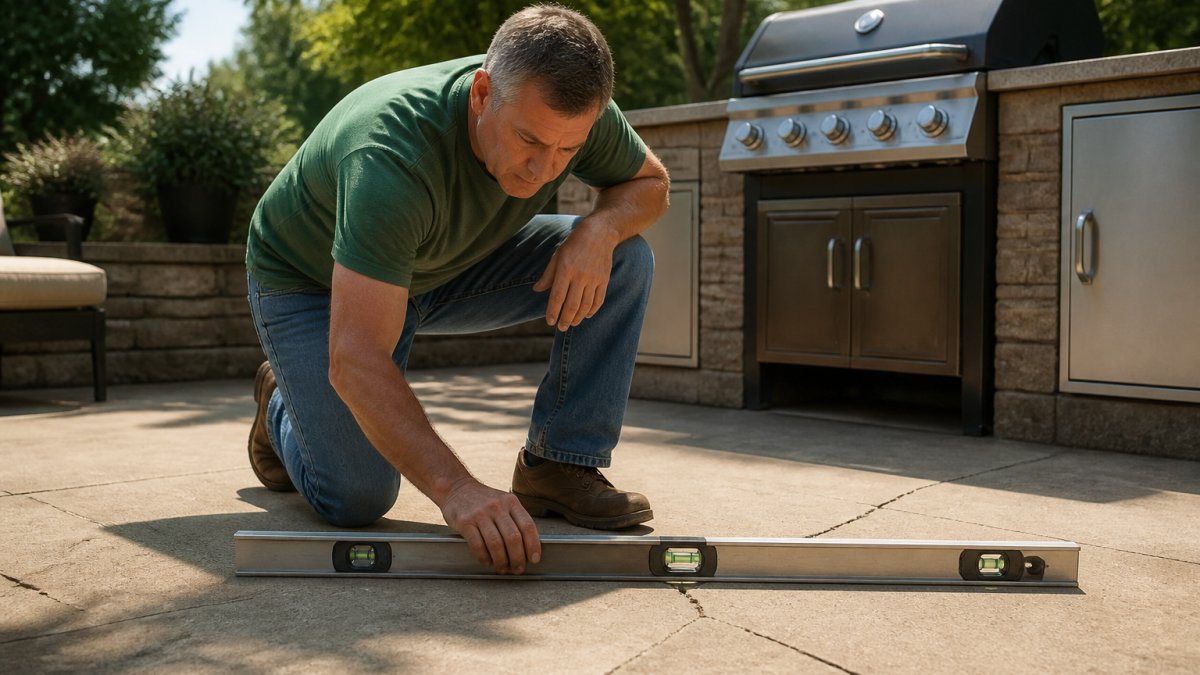
Lay a long level across the footprint in several directions and note any high or low spots. Then press down with your full weight in several places. If the surface flexes, bounces, or feels soft, the base needs attention.
The acceptable tolerance is model-specific, so check the island's installation manual. If you're not sure your patio meets it, ask a contractor before delivery.
Measure the Space and Plan the Layout
Measure the Installation Area
Measure the length and width of the space where the island will go, and mark obstacles such as steps, railings, posts, trees, and doors that swing onto the patio. Island sizes vary by model, so compare your measurements with the overall dimensions on the product page of each island you're considering.
Tape out the island's footprint on the patio at full size before you order. It's the quickest way to see if it fits and how people will move around it. Our Outdoor Kitchen Planning Checklist covers this step and the other decisions to settle before you build.
Check Distance to the House and Overhead Clearance
Note how far the island will sit from the house, fences, and other structures, and where your gas, electrical, and water lines are now. Utility runs often start at the house, so distance affects how much work is needed.
Look up, too: branches, gutters, roof overhangs, and pergolas. If the island will sit under a roof or near combustible materials, follow the clearance and venting guidance in each product's installation manual.
Plan Clearance Around the Island
Space around the island matters for safety and for how the kitchen works day to day. You need room to open doors and drawers, reach the grill controls, and step back from the heat.
Minimum clearances come from each product's installation manual, and local code may add its own. Check both before you settle on a spot. Beyond the minimums, leave room for the cook to work and for people to walk past without cutting through the cooking area.
Plan Fuel, Electrical, and Water Before You Order
Utilities are easier to plan before the island arrives than after.
- Fuel. Islands and the grills built into them are configured for propane or natural gas, depending on the model and the option you choose. Natural gas isn't available everywhere, so confirm what your property has before you order. A propane setup may use a portable cylinder or, where the product and site allow it, a property-level tank. Match the configuration to your fuel, and have a licensed gas professional handle any gas line work.
- Electrical. Refrigerators, lighting, and rotisserie motors need power. Many grills call for a GFCI-protected outlet for lights and rotisserie motors, so check each product's manual. A licensed electrician should plan the circuits and outlet locations to local code.
- Water. A sink needs a water supply and a drain. A licensed plumber can tell you what's possible at your spot.
Have these professionals look at the site before you order. They can tell you if utilities can reach the location, what work is needed, and what permits apply.
Plan the Delivery From the Curb to the Patio
Large items like outdoor kitchen islands ship by freight truck, and the carrier contacts you to schedule a delivery window. Plan the route from the curb to the patio well before that day.
Know What Curbside Delivery Includes
Curbside delivery means the driver brings the shipment to the curb or the end of your driveway. It doesn't include carrying the island into your yard, unpacking, or installation, so arrange help and equipment to move heavy pieces to the patio. Our shipping policy has the details.
Measure the Route From the Curb to the Patio
Curb or driveway. Make sure a freight truck can stop close enough to unload without blocking traffic.
Driveway to gate. Measure the narrowest gate opening and side yard, and check for low branches, awnings, or wires.
Gate to patio. Look for tight corners, steps, thresholds, and soft ground. A single step or a sharp turn can stop a hand truck or dolly.
On the patio. Leave a staging spot where pieces can sit while they're unpacked and set in place.
Write down the narrowest width, the lowest overhead clearance, and the number of steps, then compare them with the size and weight of the island you're considering. If the product page doesn't answer your question, call us at 904-621-2505 before you order.
Prepare for Delivery Day
Clear the driveway and the route, trim low branches, and move furniture and planters off the patio. Have your help lined up. Before you sign for the delivery, count the boxes and look for damage. If anything is damaged or missing, write it on the delivery receipt, take photos, and contact us within 48 hours of delivery.
Patio Readiness Checklist
Use this checklist to confirm your patio is ready before a modular outdoor kitchen island arrives.
| Task | Done | Notes |
|---|---|---|
| Inspect the patio surface | ☐ | Cracks, sunken or lifted sections, ponding water |
| Test stability | ☐ | Press down across the footprint; no flex or soft spots |
| Check level | ☐ | Long level, in several directions |
| Measure the installation area | ☐ | Length, width, and obstacles |
| Tape out the island footprint | ☐ | Compare with the island's overall dimensions |
| Check overhead clearance | ☐ | Branches, gutters, roof overhang, pergola |
| Confirm required clearances | ☐ | Each product's installation manual and local code |
| Confirm your fuel type | ☐ | Propane or natural gas; match the island's configuration |
| Gas professional assessment | ☐ | Line access, work needed, permits |
| Electrician assessment | ☐ | Circuits and outlets for appliances and lighting |
| Plumber assessment (if adding a sink) | ☐ | Water supply and drain |
| Measure the route from curb to patio | ☐ | Narrowest width, overhead clearance, steps |
| Line up help for delivery day | ☐ | Curbside freight doesn't include moving the island into the yard |
Next Steps
A solid, level base, the right clearances, utilities planned ahead, and a clear route from the curb make for a smoother start with a modular outdoor kitchen island. When your patio is ready, browse our outdoor kitchen islands and compare each model's dimensions, fuel options, and installation requirements on its product page. For the bigger picture, our guide to designing your own outdoor kitchen walks through planning step by step.
Frequently Asked Questions
Does a modular outdoor kitchen island need a concrete patio?
Not always. It needs a solid, level, stable base. A sound concrete slab is a common choice, and a well-built paver or stone patio can work if the base underneath is firm. Decks need the most caution: only consider one if the island's installation manual allows it and a qualified professional confirms the deck can carry the load. The manual for the island you choose is the final word on the base it needs.
How level should a patio be for a modular outdoor kitchen island?
Level enough that the island sits flat without rocking, its doors and drawers close properly, and its appliances sit the way the manufacturer intends. The acceptable tolerance is model-specific, so check the island's installation manual. A long level will show obvious slopes and high spots; if you're not sure your patio meets the manual's requirement, have a contractor check it before delivery.
How much room should I leave around an outdoor kitchen island?
Start with the minimum clearances in each product's installation manual, including clearance to combustible materials and structures, plus anything local code requires. Then add room for the cook to work, for doors and drawers to open fully, and for guests to walk past without crossing the cooking area. Taping out the island's footprint on the patio at full size makes this easy to see.
What should I ask a licensed professional about utility connections?
Ask if gas, electrical, and water can reach the island location, what work and permits are needed, if your property has natural gas or the island should run on propane, and what outlets and circuits the appliances need. Have these conversations before you order, so the island's configuration matches your site.
From planning the patio to choosing the island, Backyard Kitchens Direct can help you find the right pieces for the way you cook.