


How to Plan a Backyard Kitchen Layout: Start With How You Cook
Table of Contents
- Start With How You Cook, Not the Blueprint
- Outdoor Kitchen Workflow Zones: Cook, Prep, Serve, Store
- Reading Your Space Before You Commit to a Backyard Kitchen Layout
- Freestanding vs Modular Outdoor Kitchen: Which Fits Your Goals?
- Your Backyard Kitchen Planning Checklist
- Frequently Asked Questions
Last Updated: September 16, 2026
Start With How You Cook, Not the Blueprint
A backyard kitchen layout works when it is built around the person standing at the grill. This guide from Backyard Kitchens Direct walks through how to plan a backyard kitchen layout by starting with cooking habits, then matching space, equipment, and storage to them. Cooking style decides how much counter room is needed, where guests gather, and whether freestanding equipment or a modular island makes more sense. Most guides begin with shape and square footage, which produces kitchens that look right and cook wrong. The better sequence is cook first, space second, equipment third.
Outdoor Kitchen Workflow Zones: Cook, Prep, Serve, Store
Outdoor kitchen workflow zones are the four functional areas a cooking space needs: a cook zone for heat, a prep zone for cutting and seasoning, a serve zone for plating and holding, and a store zone for tools, fuel, and cold items. Grouping them by task rather than symmetry keeps steps short and surfaces clear.
Size each zone from the cooking you actually do, not from a template. A household that grills burgers twice a week needs a different prep footprint than one that breaks down a packer brisket every weekend.
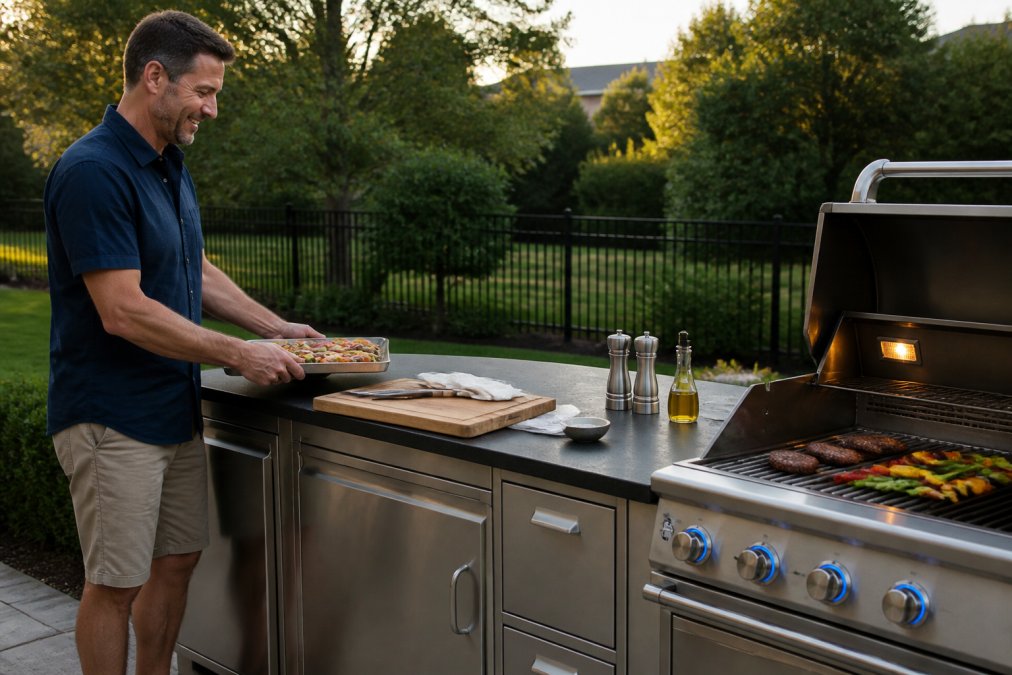
The Cook Zone
The cook zone is the heat source and the clear space immediately around it. Whether that heat comes from a freestanding grill, a built-in grill, a griddle, or a smoker shapes how much room the zone needs. What matters for planning is that nothing blocks the cook's stance and nothing flammable sits within reach. Exact clearances belong to the product manual.
Plan the cook zone in terms of stance and reach rather than square footage. The cook stands at the primary heat source and pivots to a landing surface for finished food. If that surface sits opposite the prep area, every plate crosses the cook's body. Place it on the same side as prep so the motion is a single arc.
The Prep and Serve Zones
Prep and serve are the zones homeowners most often skip, then miss. A prep station needs a stable, cleanable surface at a comfortable working height, with tools within arm's reach. The serve zone needs a place to set finished food where guests can reach it without crowding the cook. When the two share one counter, plan the order of use: prep happens before cooking, serving after.
A common pattern is a single counter run that flips roles over a meal: before cooking it holds cutting boards, mixing bowls, and raw ingredients; after, platters and serving tools. The planning question is whether the run holds the largest prep task and the largest serving task without either pushing into the cook zone.
The Store Zone
The store zone is the one most often left out of a sketch and most often regretted. It covers three kinds of storage: tools the cook reaches for mid-cook (tongs, spatulas, thermometers, gloves), consumables that stay nearby but off the counter (fuel, wood chips, foil, paper towels), and cold storage for ingredients and finished dishes.
Mid-cook tools belong within the cook's reach arc, ideally in a drawer or hook at the cook zone. Consumables belong in closed storage that keeps them dry and out of the sun. Cold storage belongs near the prep zone, where ingredients are pulled and finished dishes rest. Without a store zone, the counter becomes the store zone.
How the Zones Interact
The zones are not four separate rooms; they are four tasks that share edges, and the edges are where layouts succeed or fail. Prep and cook should share an edge so ingredients move to heat without crossing the serve area. Serve and store should share an edge so platters and cold items move in one direction. Cook and serve should not share an edge, because guests reaching for food will crowd the cook.
Test a sketch by tracing the cook's path through one meal: pull ingredients from cold storage, prep them, move them to the cook zone, land finished food, and plate at the serve zone. If that path crosses itself, doubles back, or passes through where guests stand, adjust the layout before choosing equipment.
Reading Your Space Before You Commit to a Backyard Kitchen Layout
Measure first, decide second. A backyard kitchen layout only works if the equipment and the people using it both fit, so map the patio or yard on paper with real measurements before choosing anything. Walk the space at the time of day cooking usually happens and note sun, wind, and where water collects. Mark doors, steps, and the guest path from the house, then sketch where the cook stands, where food is prepped, and where people sit.
The measurements that matter most are not total square footage but the usable run. A patio can be large and still offer only a short continuous edge for equipment and counters. Measure the longest uninterrupted edge, the depth from that edge to the nearest obstacle, and the width of the guest path to the cooking area.
Turning Measurements Into Layout Decisions
Once the space is on paper, test whether the intended zones fit the usable run. Block out the sketch with paper rectangles cut to the footprint of each piece of equipment and counter section, then slide them along the usable edge. This makes trade-offs visible before anything is ordered. If the cook zone and prep zone cannot both sit on the primary edge, shorten one zone, move one to a secondary edge, or reduce the equipment list.
The same method exposes traffic problems. Lay a strip of tape to represent the guest path from the house to the seating area. If it crosses the cook's standing position or the serve zone, the layout will feel crowded every time guests arrive. Moving the seating area, not the cooking area, usually solves this.
Climate and Seasonal Considerations
Climate shapes the layout as much as the cooking does.
High humidity and coastal air. Salt air and persistent moisture are hard on metal surfaces and anything stored outdoors. A layout that keeps equipment under a roof or cover, and stores tools in closed cabinets rather than open shelving, holds up longer. Stainless steel grades vary in corrosion resistance, so check the product manual for the grade and care instructions.
Freeze-thaw climates. In regions with hard winters, water that collects around a layout can expand and shift surfaces. Plan the cooking area on the higher, better-draining part of the patio and avoid low spots where meltwater pools. A clear plan for covering or moving equipment in winter also helps.
Hot, dry climates. Intense sun degrades finishes, warps some materials, and makes an uncovered cook zone uncomfortable at midday. Placing the cook zone in afternoon shade, or including a shade structure, makes it more usable across the season. In open, windy yards, a windbreak on the prevailing side helps burners and griddles work predictably.
Short-season climates. Where cooking outdoors happens for only part of the year, a layout that can be set up and broken down seasonally makes more sense than a fixed one. Freestanding equipment and modular islands fit this pattern better than a permanent structure.
Drainage, Sun, and Wind on the Sketch
Mark three things on the sketch before finalizing anything: the direction water flows during heavy rain, so equipment and storage stay out of its path; the sun's path at the hours cooking usually happens, so the cook's stance is not facing low sun; and the prevailing wind direction, so smoke and heat drift away from seating.
What to Confirm Before Committing
A few items are property-specific and cannot be answered by a general guide. Whether a given layout is allowed, what local requirements apply, and what product-specific conditions must be met all depend on the property and the equipment. Confirm those with the product manual and qualified local professionals before committing.
Freestanding vs Modular Outdoor Kitchen: Which Fits Your Goals?
Freestanding equipment is a grill, griddle, or smoker that stands on its own and can be moved or replaced independently. A modular outdoor kitchen island is a self-contained unit that groups cooking, counter, and storage into one footprint. A contractor-built outdoor kitchen is a permanent structure assembled on site. The three differ in flexibility, commitment, and how much space they claim. Freestanding suits renters, small patios, and cooks who want to upgrade one piece at a time. Modular suits homeowners who want an integrated look without a permanent build. Contractor-built suits those who want a fixed structure and are prepared to work with local professionals on the requirements that apply to their property.
| Setup Type | Flexibility | Space Needed | Best For |
|---|---|---|---|
| Freestanding grill, griddle, or smoker | High, move or replace individually | Small to medium | Small patios, renters, phased upgrades |
| Modular outdoor kitchen island | Moderate, reposition as a unit | Medium | Integrated look without a permanent build |
| Contractor-built outdoor kitchen | Low, fixed once built | Large | Homeowners wanting a permanent structure |
Freestanding Grills, Griddles, and Smokers
Freestanding equipment is the most forgiving starting point. A freestanding gas grill handles everyday cooking, a freestanding gas griddle handles breakfasts, searing, and flat-top cooking, and a smoker handles long, low cooks. Because each piece stands alone, a cook can start with one and add another later, rearranging the layout as habits change. The trade-off is storage: freestanding equipment usually needs nearby shelving or a cart, and offers less built-in counter space than an island.
Modular Islands and Built-In Equipment
Modular islands and built-in equipment trade flexibility for integration. A modular island can include a built-in grill, counter space, and storage in one footprint, and some models add features like sinks, wine coolers, or refrigerators. Built-in grills such as the Summerset TRL Pro 40-Inch Built-In Gas Grill and the Blaze Professional LUX 44-Inch Built-In Gas Grill are designed to sit within a structure rather than stand alone. That integration is the appeal and the constraint: once placed, the unit is harder to move. Product-specific requirements for built-in equipment belong to the manual and to qualified local professionals.
Matching Equipment to Your Cooking Style
Equipment should match the cooking a household actually does, not the cooking it imagines. A family that grills burgers twice a week needs different equipment than a cook who smokes brisket overnight or runs a griddle every weekend. The useful question is which combination covers the most meals with the least wasted space.
- Everyday grilling: a freestanding or built-in gas grill covers the widest range of weeknight cooking.
- Flat-top cooking: a freestanding gas griddle handles breakfasts, searing, and high-volume batches.
- Low-and-slow cooking: a smoker is the right tool for long cooks and does not overlap much with a grill.
- Side and finishing work: a built-in side burner or power burner keeps sauces and sides moving while the main grill works.
Your Backyard Kitchen Planning Checklist
Work through this checklist before buying anything.
- List the meals cooked most often and the equipment each one requires
- Measure the patio or yard and sketch the space to scale
- Mark doors, steps, guest paths, and the cook's standing position
- Note sun, wind, and drainage at the time of day cooking usually happens
- Decide whether freestanding, modular, or contractor-built fits the goal
- Assign rough areas for cook, prep, serve, and store
- Check that counter space and storage match the equipment chosen
- Confirm product-specific requirements against the manual
- Consult qualified local professionals about anything property-specific
Planning a backyard kitchen layout comes down to sequencing: decide how the household cooks, measure the space honestly, and choose equipment that fits both. Backyard Kitchens Direct carries freestanding gas grills, freestanding gas griddles, smokers, and modular outdoor kitchen islands, including models with integrated features like sinks, wine coolers, and refrigerators.
Planning your own build?
Get our free Outdoor Kitchen Planning Checklist: 12 points to settle before you order.
Frequently Asked Questions
What is the ideal layout for a backyard kitchen?
There is no single ideal layout because the right one follows your cooking habits. A cook who grills for two needs far less counter space than someone who smokes for a crowd. Start by listing how you actually cook, then arrange cook, prep, serve, and storage zones so you can move between them without crossing your own path. The layout that keeps your steps short and your landing space clear is the one that works.
What are the primary zones in an outdoor kitchen layout?
Most backyard kitchen layouts break into four workflow zones: cook, prep, serve, and store. The cook zone holds your grill, griddle, or smoker. The prep zone gives you a flat surface for trimming, seasoning, and staging food. The serve zone is where plates and drinks land. The store zone covers cabinets, coolers, or shelving. Grouping these zones so they sit near each other reduces back-and-forth trips during a cook.
What is the difference between a freestanding grill and a modular outdoor kitchen island?
A freestanding grill or griddle stands on its own cart or legs and can be moved or stored as needed. A modular outdoor kitchen island is a built unit, often with a countertop, storage, and sometimes a sink or refrigerator, that stays in place. Freestanding equipment suits renters, small patios, and cooks who want flexibility. Modular islands suit homeowners who want a permanent cooking and prep surface.
How does my cooking style influence my backyard kitchen layout?
Your cooking style sets the size and shape of every zone. Someone who mostly sears steaks needs a hot cook zone and a small prep area. A smoker who runs long cooks needs storage for wood or pellets, a place to rest meat, and room to work without crowding the smoker. Griddle cooks need a wide, flat prep surface nearby. Match the layout to the food you actually make, not to photos of someone else's setup.
What should I consider when evaluating my available patio space?
Walk the space at the time of day you normally cook and note sun, wind, and foot traffic. Measure the footprint of any equipment you are considering, then check the product manual for its specific clearance and placement requirements. Leave room to open lids, pull out drawers, and walk behind anyone working at the counter. If the space is tight or oddly shaped, a freestanding setup or a compact island may fit better than a large built arrangement.
Is there a free app to design a kitchen layout?
Several free planning tools let you sketch a layout and drop in shapes for grills, counters, and seating. Treat any app as a rough sketch tool, not a source of final measurements. Confirm equipment footprints and placement requirements against the manufacturer's product manual, and check with local qualified professionals for anything involving utilities or site work before you commit to a plan.


