


Maintaining Your Outdoor Gas Grill for Longevity
Table of Contents
- Gas Grill Cleaning Schedule: After Every Cook, Monthly, and Seasonal
- How to Clean Grill Burners Without Damaging Them
- Grate Care for Stainless Steel and Cast Iron
- Flame Tamers, Grease Trays, and Drip Pans
- Off-Season Grill Storage Guide: Winterization vs. Year-Round Use
- Troubleshooting Performance Issues and Knowing When to Replace Parts
- Explore Backyard Cooking Options
- Frequently Asked Questions
Last Updated: September 25, 2026
Gas Grill Cleaning Schedule: After Every Cook, Monthly, and Seasonal
A gas grill lasts longer when routine care happens on a predictable schedule. This guide from Backyard Kitchens Direct breaks down what to do after every cook, once a month, and at the change of seasons. The routine applies to both freestanding gas grills and built-in gas grills. Your owner's manual always comes first, since care steps, approved cleaners, and intervals vary by model.
| Interval | Tasks |
|---|---|
| After every cook | Burn off residue, brush the grates, check the grease tray |
| Monthly | Inspect burners, gas connections, ignition, and drip pan |
| Seasonal | Deep clean, inspect parts, prepare for storage or cold-weather use |
After Every Cook
Heat is the first cleaning tool. Many owner's manuals recommend running the burners for a short burn-off period with the lid closed after cooking, which loosens food residue before it hardens. Check your manual for the recommended setting and time.
- Brush grates while they are still warm, not cold
- Empty the grease tray before it fills
- Wipe the lid and control panel with a damp cloth, then dry them
- Let the grill cool and dry fully before covering it
Monthly Checks
Once a month, look past the cooking surface. Remove the grates and inspect the burner tubes, flame tamers, and drip pan underneath.
- Check burner tubes for blockages or corrosion
- Look at the gas hose and connections for cracks or wear
- Test the ignition system
- Scrub the drip pan and grease tray
For how to check gas connections for leaks, see our propane grill safety tips for homeowners.
A common mistake is cleaning only what you can see. The grease tray, drip pan, and burner area collect most of the buildup that shortens a grill's life, so give them attention every month.
How to Clean Grill Burners Without Damaging Them
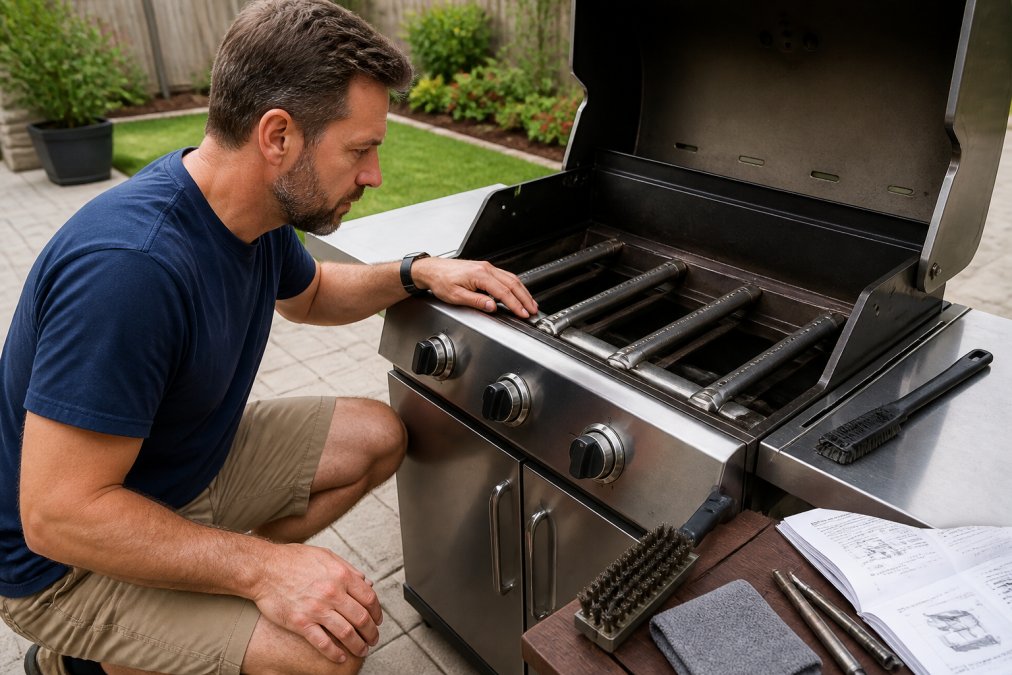
The best way to clean grill burners is gentle: brush away loose debris, clear the ports with the brush or tool your owner's manual recommends, and avoid harsh chemicals. Burner tubes are thin metal, and rough handling can bend them or widen the ports, which throws off heat distribution.
Burner Tubes and Venturi Tubes
Burner tubes carry gas to the flame ports. Venturi tubes are the narrower sections that pull in air and mix it with gas before it reaches the burner. Insects and spider webs can block venturi tubes, which is a common reason for a weak or yellow flame.
- Never enlarge burner ports with a sharp tool
- Don't soak or submerge burners unless your manual says it's safe
- Clear venturi tubes gently with a narrow brush
- Replace a burner that is cracked or badly corroded
Grate Care for Stainless Steel and Cast Iron
Grate care depends on the material. Stainless steel grates resist rust and clean up with regular brushing. Cast iron grates hold heat well but need a light coat of cooking oil to stay protected.
- Stainless steel: brush, wipe, and dry fully to avoid water spots
- Cast iron: oil after cleaning to help prevent rust
- Never soak cast iron in soapy water
- Store grates dry, not damp
For the rest of the stainless steel in an outdoor kitchen, see how to maintain outdoor kitchen stainless steel.
Leaving cast iron grates wet is the fastest way to rust them. Dry them fully and oil them before the grill goes back under a cover.
Flame Tamers, Grease Trays, and Drip Pans
Flame tamers (also called heat deflectors, and on some brands flavor bars), grease trays, and drip pans catch what falls through the grates, so they take the worst of the buildup. Ignoring them leads to flare-ups, smoke, and a shorter grill life.
- Scrape flame tamers every few cooks
- Clean trays and pans monthly
- Replace flame tamers once they are badly rusted or warped
- Keep the drip pan dry to slow corrosion
Off-Season Grill Storage Guide: Winterization vs. Year-Round Use
Storage decisions come down to one question: will the grill be used through the cold months, or shut down until spring? An off-season grill storage guide should start there, because the two paths need different care. From there, the climate where the grill lives shapes the rest of the plan.
Year-Round Use
If the grill stays in service through winter, keep the monthly checks going. Clear snow and ice off the lid before opening it, and never chip at frozen residue with a metal tool, which can scratch porcelain or stainless finishes. Keep up the burn-off after each cold-weather cook so grease doesn't congeal in the firebox.
Winterization
For a full shutdown, deep clean the grill, dry every part, and shut off the gas. On a propane grill that uses a portable cylinder, disconnect the cylinder and store it outdoors, upright, and away from the house, never in a garage, basement, or shed. On a natural gas grill, or a propane grill connected to a property-level tank, close the supply valve. Follow the manufacturer's instructions and your gas supplier's guidance for your setup.
- Deep clean before storage, not after
- Dry all parts to prevent rust
- Shut off or disconnect the gas supply per the manufacturer's instructions
- Use a cover that fits and breathes
Climate-Specific Adjustments
The same grill ages differently depending on where it sits. These patterns are worth planning around.
| Climate Pattern | Main Risk | Maintenance Adjustment |
|---|---|---|
| Coastal salt air | Surface corrosion on stainless and fasteners | Wipe down exterior surfaces more often, following your manual's cleaning guidance; inspect hinges, screws, and welds each month |
| Humid summers | Mold, mildew, and trapped moisture under covers | Remove the cover on dry days to air out; make sure the grill is dry before recovering it |
| Dry heat and dust | Dust and pollen clogging burner ports and venturi tubes | Inspect burners more often; clear ports as needed |
| Freeze-thaw winters | Condensation inside the firebox | Dry the grill fully before storage; use a breathable cover rather than sealing it airtight |
| Heavy pollen season | Sticky residue on grates and lid | Wipe the lid and control panel regularly; brush grates before each cook |
Cover Use
A cover helps, but only if the grill is dry underneath. Trapping moisture under a cover can do more harm than leaving the grill exposed. Choose one of the grill covers made for your grill's size, and check it after storms. A cover that pools water on top or flaps loose in wind can cause its own damage. Look for vents or a breathable fabric, and check the owner's manual for cover guidance specific to your model. Some manufacturers make covers sized to their own grills, carts, and griddles, such as the Wildfire Grill & Griddle Cover for the Ranch Pro line.
The most important off-season step is drying the grill completely before it goes under a cover. Match your storage routine to your climate, not just the calendar.
Troubleshooting Performance Issues and Knowing When to Replace Parts
Most performance problems trace back to a handful of causes. The table below pairs common symptoms with a likely cause and a first check. Work through the simple checks first, then use the owner's manual for model-specific troubleshooting.
| Symptom | Likely Cause | First Check |
|---|---|---|
| Uneven heat across the cooking surface | Clogged burner ports or blocked venturi tubes | Remove grates and flame tamers; inspect burner tubes for debris or spider webs |
| Weak or yellow flame | Low gas supply, or partially blocked burner ports or venturi tubes | Confirm the gas supply; clear ports and venturi tubes per the manual |
| Grill will not light | Dirty ignition electrode, spent battery, or loose connection | Inspect the ignition system per the owner's manual |
| Flare-ups during cooking | Grease buildup on flame tamers or drip pan | Scrape flame tamers; empty and clean the drip pan |
| Rust spots in the firebox | Moisture trapped under a cover or in corners | Dry the firebox fully; check cover fit and ventilation |
| Hot spots on part of the grill | Warped flame tamers or a bent burner tube | Inspect for warping; replace parts that no longer sit flat |
Component Inspection Guide
Parts wear at different rates depending on use, climate, and care. The guidance below is general, not a manufacturer specification. Always check the owner's manual for the recommended inspection and replacement schedule for your model.
- Cooking grates: Inspect monthly. Stainless steel grates hold up well with regular cleaning. Cast iron grates need to be kept oiled and dry, or they will rust.
- Flame tamers: Inspect every few months. Replace when they are badly rusted, warped, or no longer sit flat, since warped parts cause hot spots and flare-ups.
- Burner tubes: Inspect monthly during the cooking season. Replace when cracked, heavily corroded, or when ports can no longer be cleared. A burner that will not produce an even flame after cleaning is a candidate for replacement.
- Ignition system: Test monthly. Replace the electrode or module when the grill no longer lights reliably after cleaning, per the owner's manual.
- Gas hose and regulator: Inspect monthly for cracks, stiffness, or wear. Replace per the manufacturer's recommended interval, which is stated in the owner's manual.
- Firebox: Inspect seasonally. Heavy rust-through is usually a sign the grill has reached the end of its life.
Repair or Replace
Some parts are worth replacing; others signal it is time for a new grill. Burners, grates, flame tamers, and ignition components are common replacement items, and swapping worn parts can keep a grill in service longer. Use genuine replacement parts from the manufacturer for your model. A firebox with structural rust-through, a cracked lid, or controls that no longer work reliably usually means the grill has reached the end of its life.
Explore Backyard Cooking Options
Grill maintenance rewards consistency more than effort. A few minutes after each cook, a short monthly check, and a proper off-season routine will keep a gas grill running well. When it is time to upgrade or build out an outdoor cooking space, Backyard Kitchens Direct carries freestanding and built-in gas grills, freestanding gas griddles, smokers, and modular outdoor kitchen islands, shipped to the lower 48 states. That includes the Ranch Pro line from Wildfire Outdoor Living, built from 304 stainless steel with matching carts, covers, and outdoor kitchen components. Every product comes with its manufacturer's documentation, the starting point for care.

Frequently Asked Questions
How long should an outdoor gas grill last?
Lifespan depends mostly on build quality, materials, climate, and care, so it varies widely by model. A grill cleaned on a regular schedule, kept dry, and stored properly will generally outlast one that is neglected. Replacing worn parts like burners and flame tamers when they show serious corrosion also helps keep a grill in service. Check the owner's manual and warranty for what the manufacturer covers and for how long.
What can I use on my grill to keep it from rusting?
The most reliable rust prevention is a clean, dry grill. After each cook, burn off residue, brush the grates, and let the grill dry fully before covering it. A light coat of cooking oil on cast iron grates after cleaning helps block moisture. For stainless steel surfaces, wipe with a damp cloth and dry. Your owner's manual may list approved cleaners or protectants; follow it, since recommendations vary by model and finish.
How often should I deep clean my gas grill?
A common routine is a deep clean at the start and end of the grilling season, plus anytime you notice heavy grease buildup or uneven heat. A deep clean covers the burners, flame tamers, grease tray, and drip pan. Grills used heavily may need it more often. Check your owner's manual for the interval your model calls for.
What is the best way to protect a gas grill during the off-season?
Start with a full clean and dry-out, since trapped grease and moisture cause corrosion. Shut off the gas supply: disconnect a portable propane cylinder and store it upright outdoors, or close the supply valve on a natural gas or property-tank setup, following the manufacturer's instructions. Use a cover that fits your grill and allows airflow, and check it after storms so water does not pool. Review your owner's manual for model-specific winterization steps.


